
I thought i might as well do a little tutorial on how to do the job of replacing valve stem seals. Here it is.
Maybe someone can put this up on bump wiki for me.
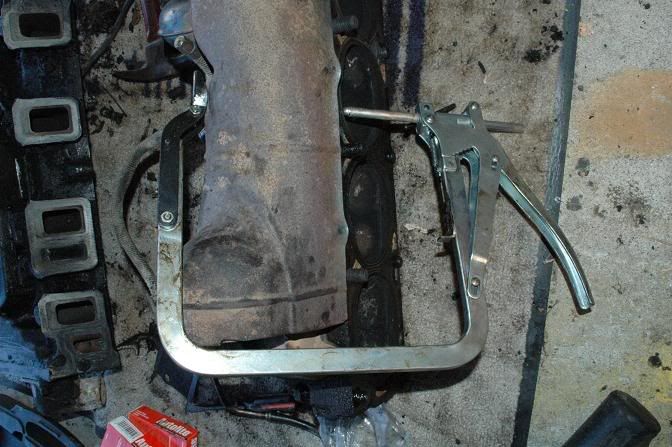
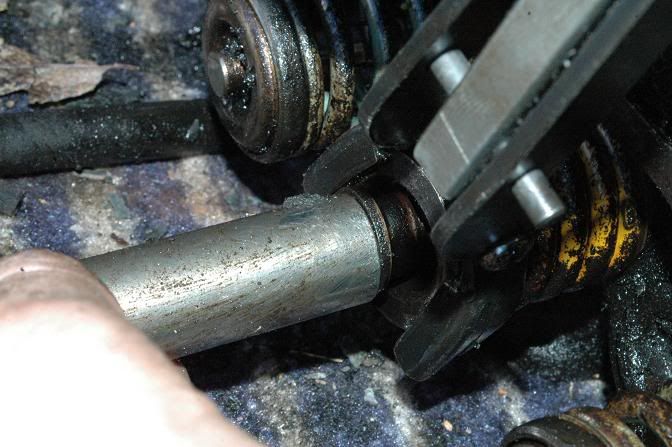
First, get your hands on one of thes handy tools. A Valve Spring Compressor. You can either buy it or borrow it if you have a local Kragen auto parts, I'm not sure who else rents these. It was free.

Basically you've got the big C-Clamp deal and you adjust the rod with the t-handle to fit over your heads, so when you clamp down you can get a good clamp. It may take some adjusting. On the valve spring part of the tool you will probably have to loosen that nut almost all the way so that the jaws are big enough for our big valve springs.
So once you have adjusted the tool, its clamping time!
Like so:
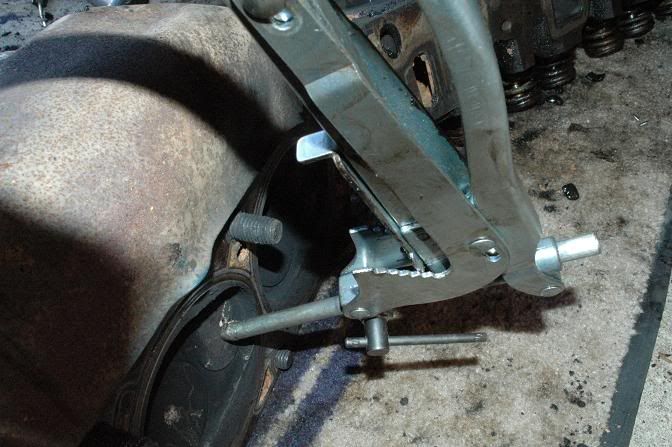
Actually, before i did any clamping i took a 3/4" socket and smacked every valve spring, which definately helped with compressing the spring. The ones i didn't smack at first sometimes wouldn't compress. After a quick smack they compressed fine.
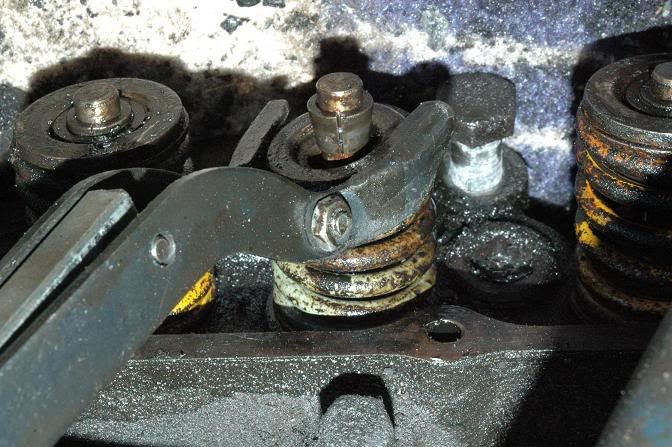
The intake, and the exhaust valves have two different style retainers.
One looks like the above picture, which are two little circular retainer clips
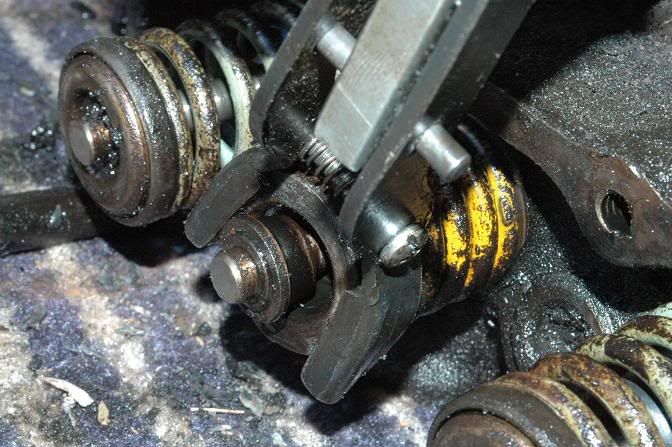
And the other looks like this. It has the same two clips, however it also has another circular retainer that the two small clips must go inside of.
Style 1.
Clamp down on the spring, and pull these two clips off.
Then release the tension on the spring and pull the spring off.Now you can either pull your old seal off or you can, like in my case, clean the remaining pieces of the old valve seal off of the spring surface and valve stem. You can also pull your valve out if you want.
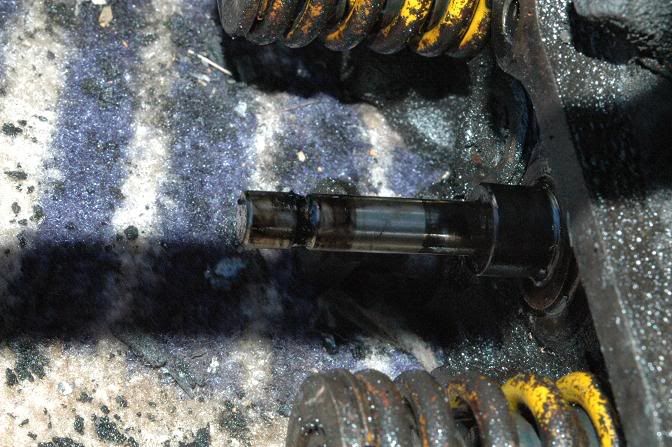
Bare valve stem. Notice the groove on the stem, the two little retainers on every spring assembly all have a groove (more like a bump) that fits into the groove on the stem.
New seal:

Then slip hte spring back on, and compress the spring once again.
Then grab the two little retainers and stick them onto the valve stem on that groove (the grease will hold them on enough). Then release the tension and the spring will push against the little retainers and you are done.
Style 2 is very similiar but has another retainer piece.
This time, during disassembly, when you have the spring compressed, grab a 1/2" socket and tap the circular retainer off of the little 2 retainers.
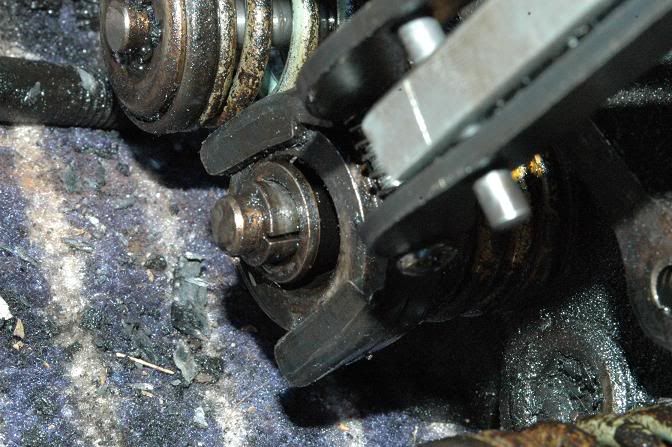
Pull the 2 little pieces out, a magnet is great help here. Then slide the circular piece off and release the spring. Replace seal, set spring back on, compress spring, and then slide the outer retainer piece down onto the compressed spring. Then stick the two little retainer pieces on the valve stem like with the other style, and slowly release the spring. Just make sure the outer circle piece glides over the little 2 retainers and seats properly. You are done.
14 more to go
The first one took me 45 minutes, every one after that took me 2 minutes tops. It goes very fast when you get your system going.


